QNAP guide - how to add a network share to powernode / node without guest rights
I received my powernode yesterday and set up was smooth but adding the music folder from the qnap nas to the library required a bit of configuration on the NAS. I couldn't find this info in the bluesound help pages or this forum, so I'll describe the extra steps here as it may help others.
Note the steps below are only necessary if you don't have guest access rights enabled on the multimedia / music folder on the NAS. If you do have guest access enabled, then the bluesound app should find the shared directory (music folder) automatically and you can skip all of this.
Assumptions: the steps below assume your files are located in Multimedia/music, which is the QNAP default location for these files. However, if you've put your music in a different folder, then just adapt the steps below to your specific music folder location.
The broad steps are :
- PART 1: Check your NAS has SMB2.1 or higher enabled for security purposes (SMB 1 has vulnerabilities)
- PART 2: Create a restricted user account for the sole purpose of accessing the music folder from the powernode / node
- PART 3 : Find your NAS name and path to the music folder and enter this path into the bluesound app
-------------------------------------------------
PART 1 Login to your QNAP NAS
-------------------------------------------------
- enter control panel
- click on Network and File Services >> Win/Mac/NFS.
- check that file service for Microsoft networking is enabled shown by a tick box
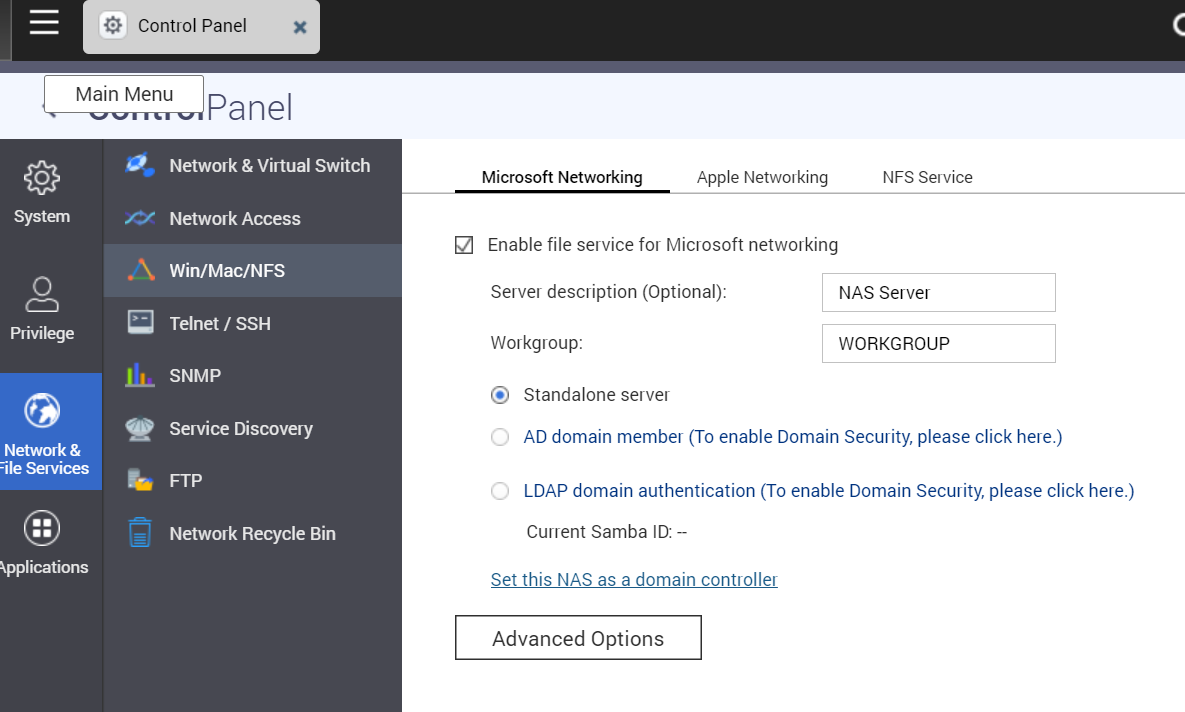
- click advanced options, then this screen will pop up
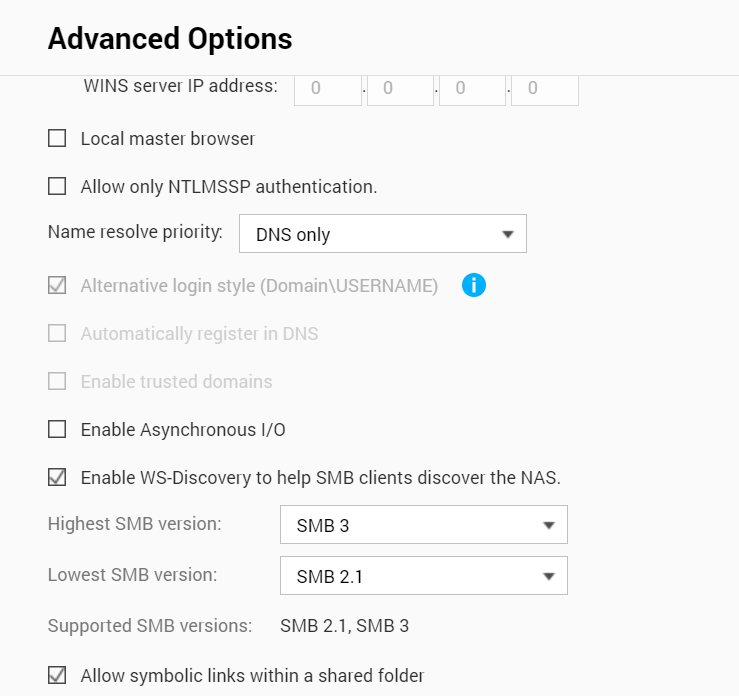
- Check that SMB2.1 is selected in the lowest SMB version and v3 is selected in the highest SMB version.
- Note: if you have other devices on your network which are old and don't support SMB >2.0, then you may need to leave this on SMB1.0 otherwise your other devices won't be able to access the QNAP folders. Test it and see.
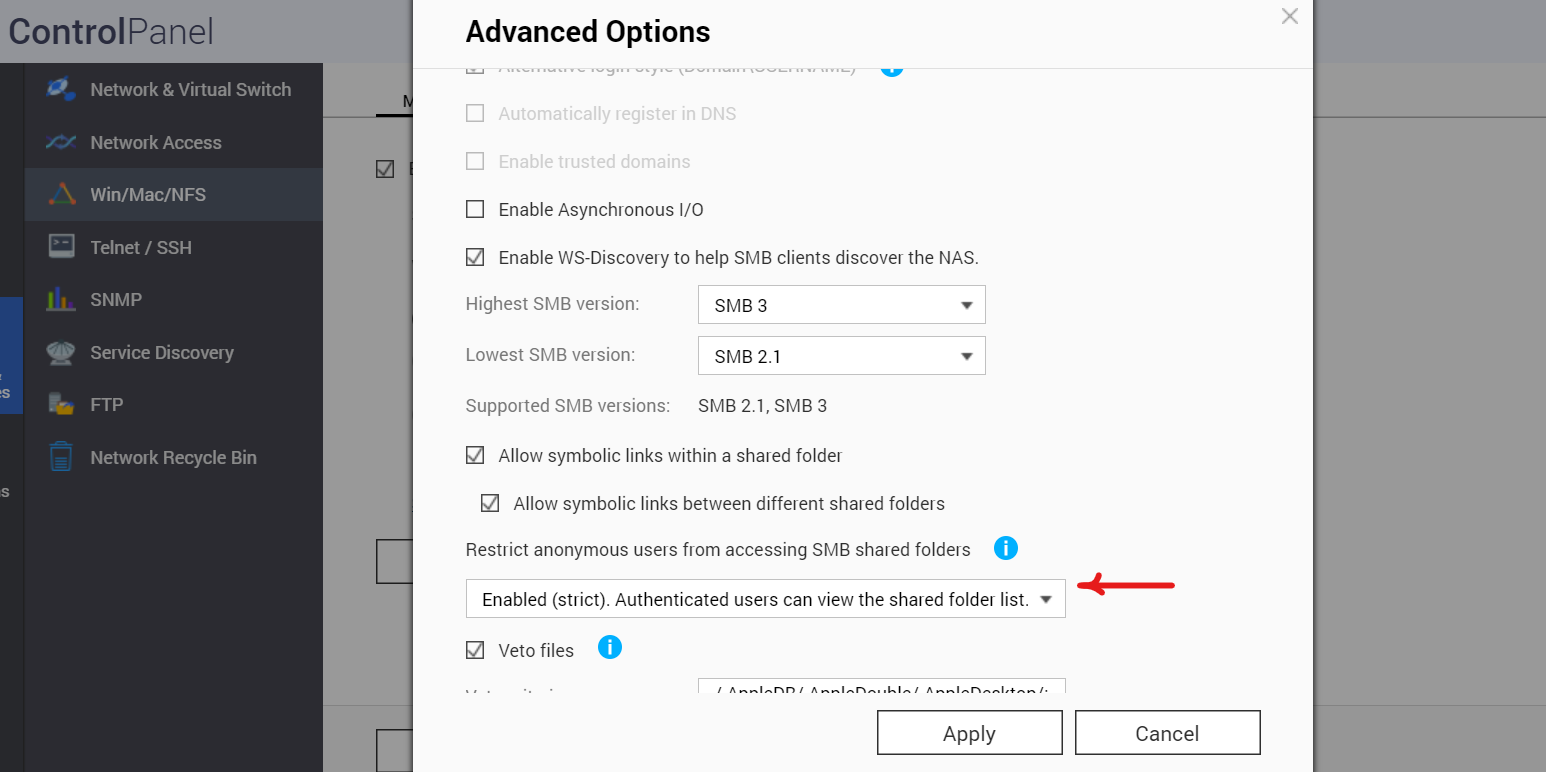
- for security purposes you don't want anonymous users access your shared folders. so select enabled (strict).
- Press Apply. That's part one done.
-------------------------------------------------
PART 2 Create a restricted user
-------------------------------------------------
In this step we are going to create a new user with read only rights to the Multimedia folder.
- From the QTS control panel - click create new user

- (yours may look different depending on which users you have)
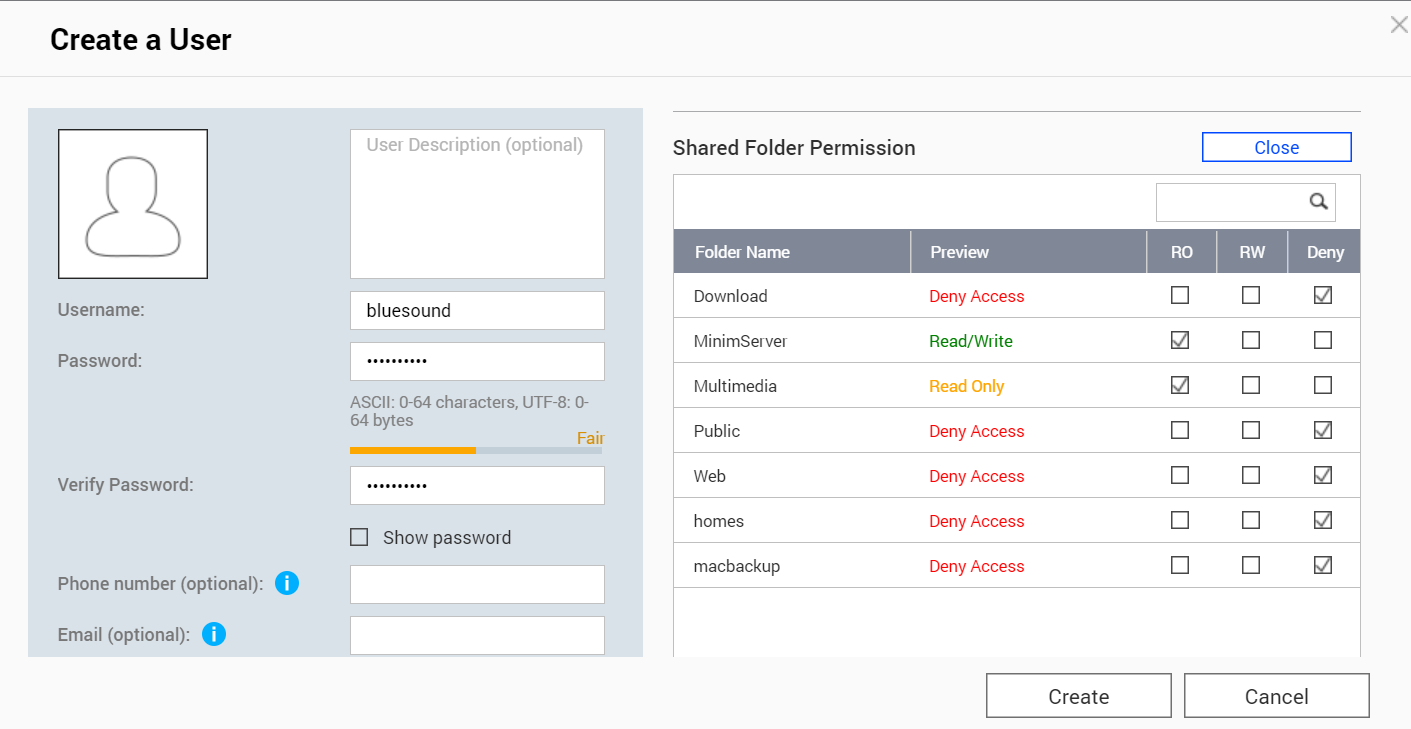
- fill in the boxes with a new username and password my new user is called : bluesound , don't click on "Create" until all the steps below are completed.
- on the right hand side click the shared folder permissions and click DENY on everything except the Multimedia folder (ignore the MinimServer, you may not have this installed)
- choose Read Only for the Multimedia folder.
Next select the application permissions for this user
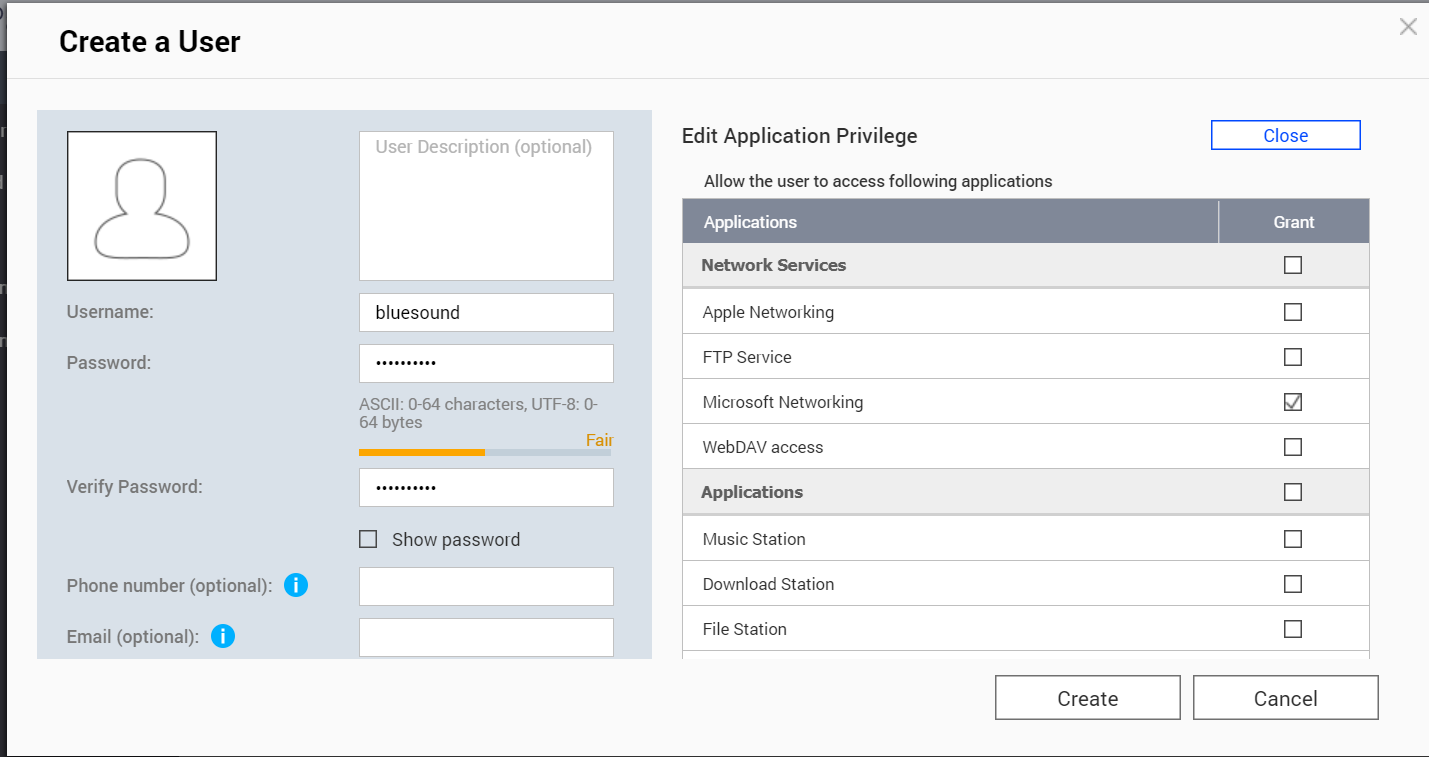
- untick everything except the Microsoft Networking
- Now press create.
-------------------------------------------------
PART 3 : NAS name and folder path
-------------------------------------------------
- Note down the name of your QNAP NAS. you can find by clicking on the hamburger menu in the top left. The name of your NAS will be something like NASF12345
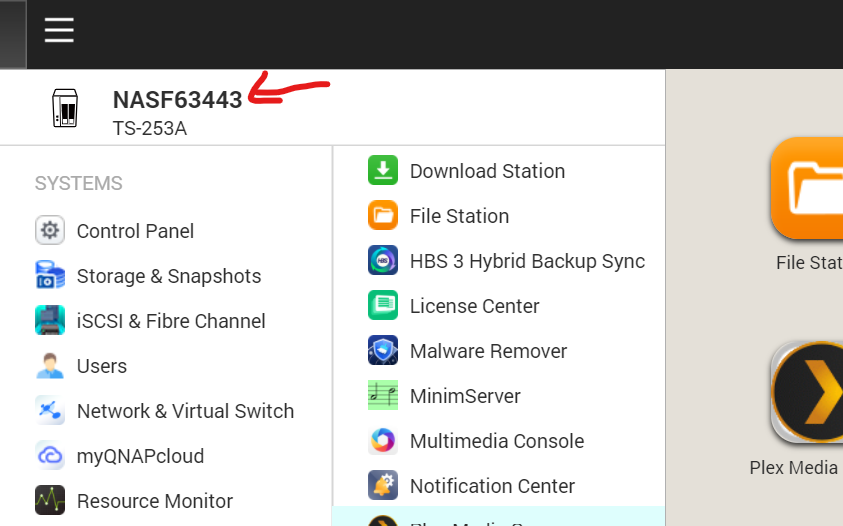
2. confirm the path to your music folder
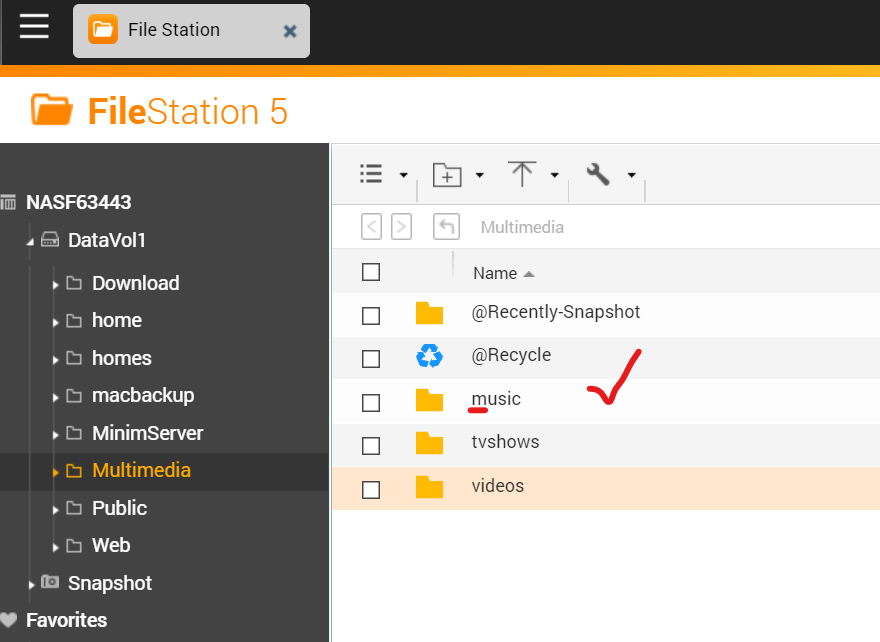
Use file station to find your music folder, usually it is in Multimedia/music but yours may be different. What is very important here is that the folder names are case sensitive so Multimedia/Music is different from Multimedia/MUSIC and Multimedia/music.
ok, now over to the bluesound app
- From the Navigation Drawer, select Settings, Music Library, Network Shares
- Select Find Network Shares (none will be found)
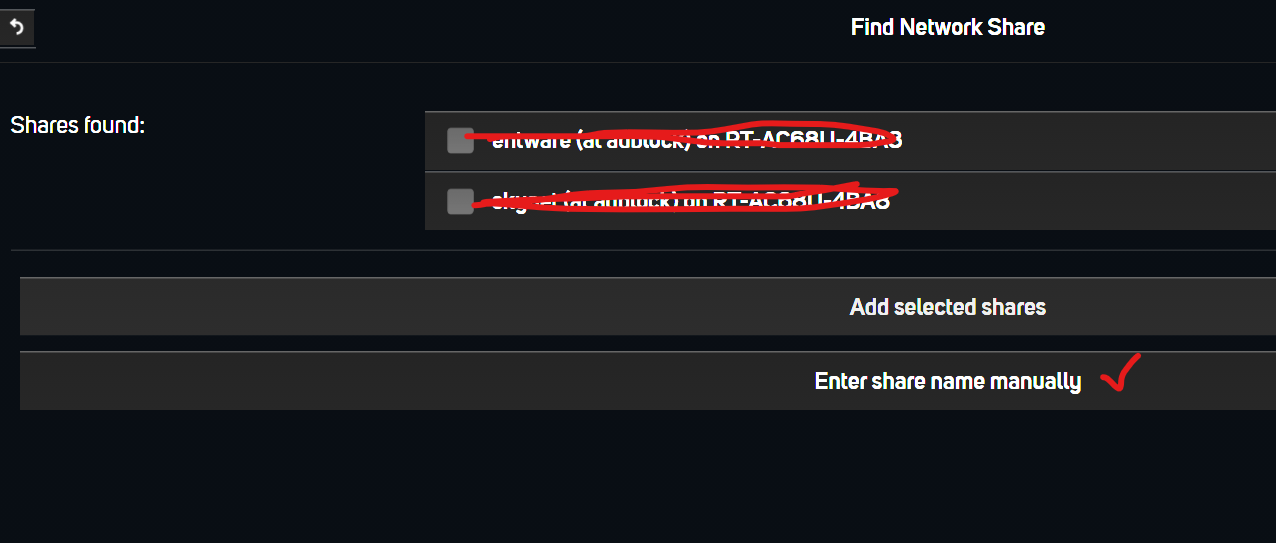
- If the desired Shares do not appear select Enter share manually
- If you selected Enter share manually, enter \\YOUR QNAP NAME HERE\{share-path which is case sensitive} in the Enter Share Name field
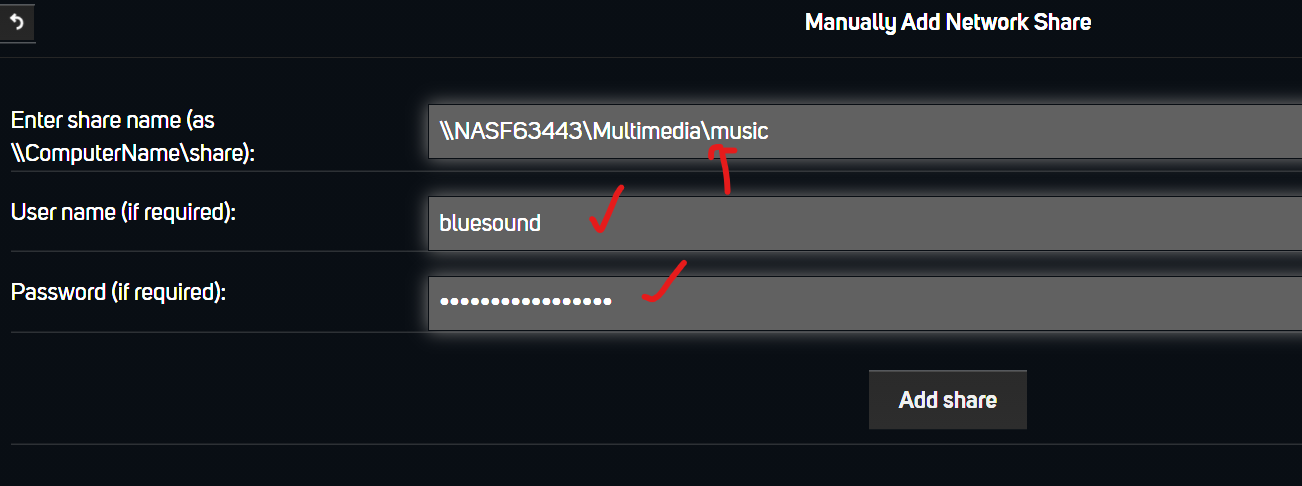
- add your username and password (the ones you made in step 2) and press add share
- All being well, the powernode should now be able to find your music folder.
-
Very interesting guide. Non-guest access SMB sharing varies from NAS to NAS, so this will definitely help. It may apply to a certain range of QNAP models so for accuracy what was the make/model of the QNAP used here?
0 -
it's a TS-253A.
0 -
Hi Neil, Fantastic article you've put up. Ive been messing about for ages and getting without any joy. Extremely clear and first rate.Thank you ever so much for sharing this!
Pete
0 -
Pete, glad it's working for you. thanks for the feedback
0 -
Thanks, very well described for Qnap NAS users. It worked fine. I even did not need the complete folder path to give access.
0 -
Perfect guide, thanks! Fast and easy!
0
Please sign in to leave a comment.


Comments
6 comments